How to Remove Milia at Home with a Needle: Risks, Technique & Safer Alternatives
Milia are small, firm, white bumps that sit just beneath the surface of the skin and stubbornly refuse to respond to squeezing, cleansing, or most over-the-counter products. Because they look deceptively simple, many people consider attempting removal at home with a needle. This article explains exactly how the needle technique works — both in a professional setting and at home — why the risks are more significant than they might appear, and what evidence-based alternatives are worth trying first.
Key Takeaways
- Milia are keratin-filled cysts sealed beneath intact skin; they cannot be popped like a pimple and require a small incision to release their contents.
- The needle technique used by dermatologists and trained estheticians involves sterile single-use instruments, precise depth control, and clinical judgement — factors that are difficult to replicate safely at home.
- DIY needle extraction carries real risks including infection, scarring, post-inflammatory hyperpigmentation, and permanent skin pitting, particularly around the delicate eye area.
- Topical retinoids, AHA and BHA exfoliants, and professional in-office procedures offer safer and often more effective routes to milia removal.
- Some bumps that look like milia are actually different conditions — misidentification is a key reason professional assessment matters before any extraction attempt.
What Are Milia?
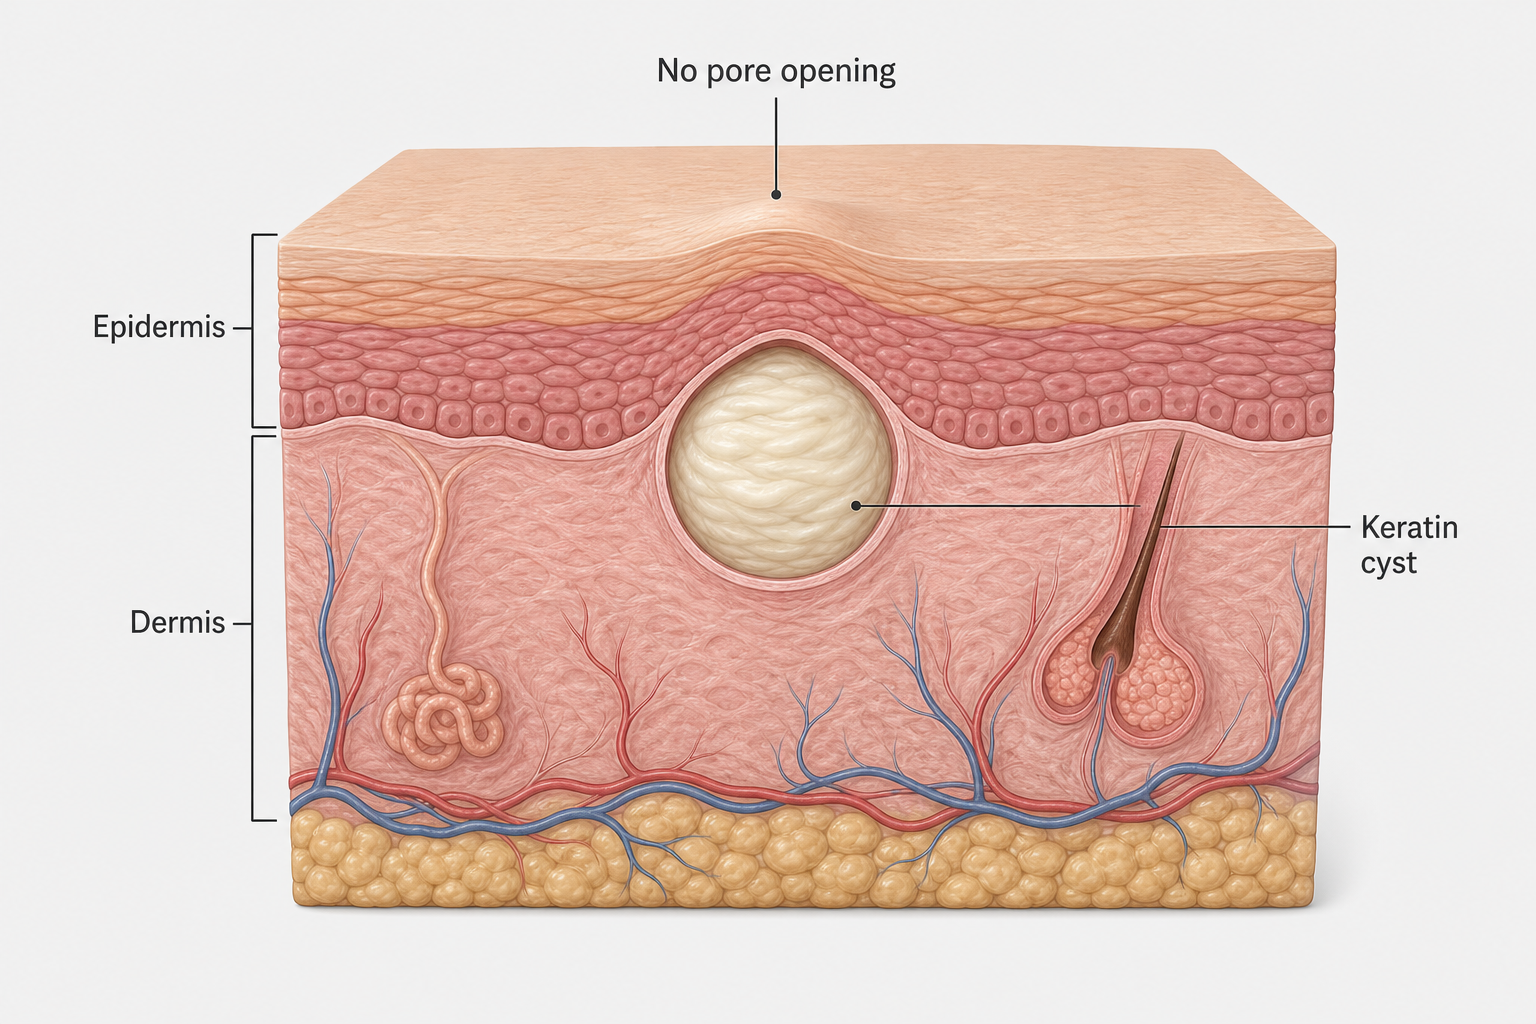
A milium (the singular form of milia) is a tiny keratin-filled cyst that forms just beneath the surface of the skin. Keratin is the structural protein that makes up skin cells, hair, and nails. When dead skin cells become trapped rather than shedding normally, they can accumulate and form a firm, dome-shaped white or yellowish papule typically measuring one to two millimetres in diameter. These small bumps are sometimes called milk spots, particularly when they appear in newborns, though they are common in adults too.
Unlike a whitehead or closed comedone, a milium has no pore opening connecting it to the skin surface. It sits within the stratum corneum — the outermost layer of the skin — or within a vellus hair follicle, completely sealed by intact skin above it. This is the fundamental reason that squeezing achieves nothing: there is no channel through which the trapped keratin can escape. The skin must be physically opened before the contents can be released.
Primary and Secondary Milia
Primary milia arise spontaneously when cell turnover slows and keratin becomes trapped without any obvious external cause. They are particularly common around the eyes, on the cheeks, forehead, and nose. Secondary milia develop as a response to skin trauma or damage — including burns, blistering conditions, dermabrasion, prolonged use of heavy occlusive creams, or topical steroid use. Secondary milia can also appear after certain laser treatments or chemical peels. Understanding which type you have matters clinically, because secondary milia may resolve if the underlying cause is addressed, while primary milia typically require active treatment.
A less common variant called milia en plaque involves clusters of milia forming on a raised, inflamed base. This type is not suitable for needle extraction and requires specialist assessment. Flat or hyperkeratotic milia similarly do not respond well to the standard lancing technique used for typical dome-shaped lesions.
Why Milia Cannot Be Squeezed Like a Pimple
The absence of a surface pore is what makes milia so frustrating. Applying pressure to a milium compresses the surrounding skin but cannot force the keratin plug out through intact skin above it. Instead of releasing the cyst contents, squeezing risks bruising the tissue, causing inflammation, and potentially rupturing the cyst wall beneath the skin — which can trigger a foreign body reaction and worsen the appearance of the area. This is why the standard advice from dermatologists is clear: do not attempt to squeeze milia.
A tiny incision — either a pinpoint puncture or a shallow cut — is the only mechanical way to create an opening through which the trapped keratin can be expressed. This is the basis of the needle or lancet technique used in clinical settings.
How the Professional Needle Technique Works
In a professional setting, manual extraction of milia using a needle or sterile lancet is a straightforward but precision-dependent procedure. Understanding what a trained clinician does — and why each step matters — helps explain why the same approach is considerably riskier when attempted at home.
The Clinical Process Step by Step
- Cleansing and preparation: The skin is thoroughly cleansed and the treatment area is examined, often under magnification, to confirm the diagnosis and assess the depth and position of each milium.
- Sterile technique: A sterile single-use lancet — typically a fine-gauge instrument such as a 25 to 30 gauge needle or a #11 surgical blade — is selected. Instruments are never reused between patients or between lesions without re-sterilisation.
- The tiny incision: The clinician makes a precise, shallow puncture or tiny incision at the edge or surface of the milium, angled to open the cyst wall without cutting too deeply into the dermis below. This de-roofing technique creates a controlled opening while minimising trauma to surrounding tissue.
- Expression: A comedone extractor or gentle manual pressure is used to ease the firm keratin plug out through the incision. The contents of a milium are typically a solid or semi-solid white ball of keratin rather than the liquid pus found in an infected pimple.
- Aftercare: An antiseptic is applied to the pinpoint wound. The treated area is left to heal, usually forming a tiny crust that resolves within three to five days.
The entire process for a single milium takes only seconds in experienced hands. What makes it safe in a clinical environment is not the technique itself but the combination of correct diagnosis, sterile instruments, appropriate depth control, and the practitioner’s ability to recognise and respond to complications.
Attempting Milia Removal at Home with a Needle
Many people do attempt this at home, and some succeed without immediate visible harm. However, the risks are real and the margin for error is narrow, particularly around the eye area. The following describes what a home attempt typically involves and where it commonly goes wrong.
What People Typically Do at Home
A common home approach involves sterilising a sewing needle or pin with rubbing alcohol, cleansing the skin, and attempting to pierce the surface of the milium before applying pressure to express the contents. Some people use a comedone extractor after making the initial puncture. The intention mirrors the professional lancing technique, but several critical differences affect the outcome.
Why Home Attempts Carry Greater Risk
The risks of DIY needle extraction are not theoretical. They reflect the practical gap between a controlled clinical environment and a bathroom mirror.
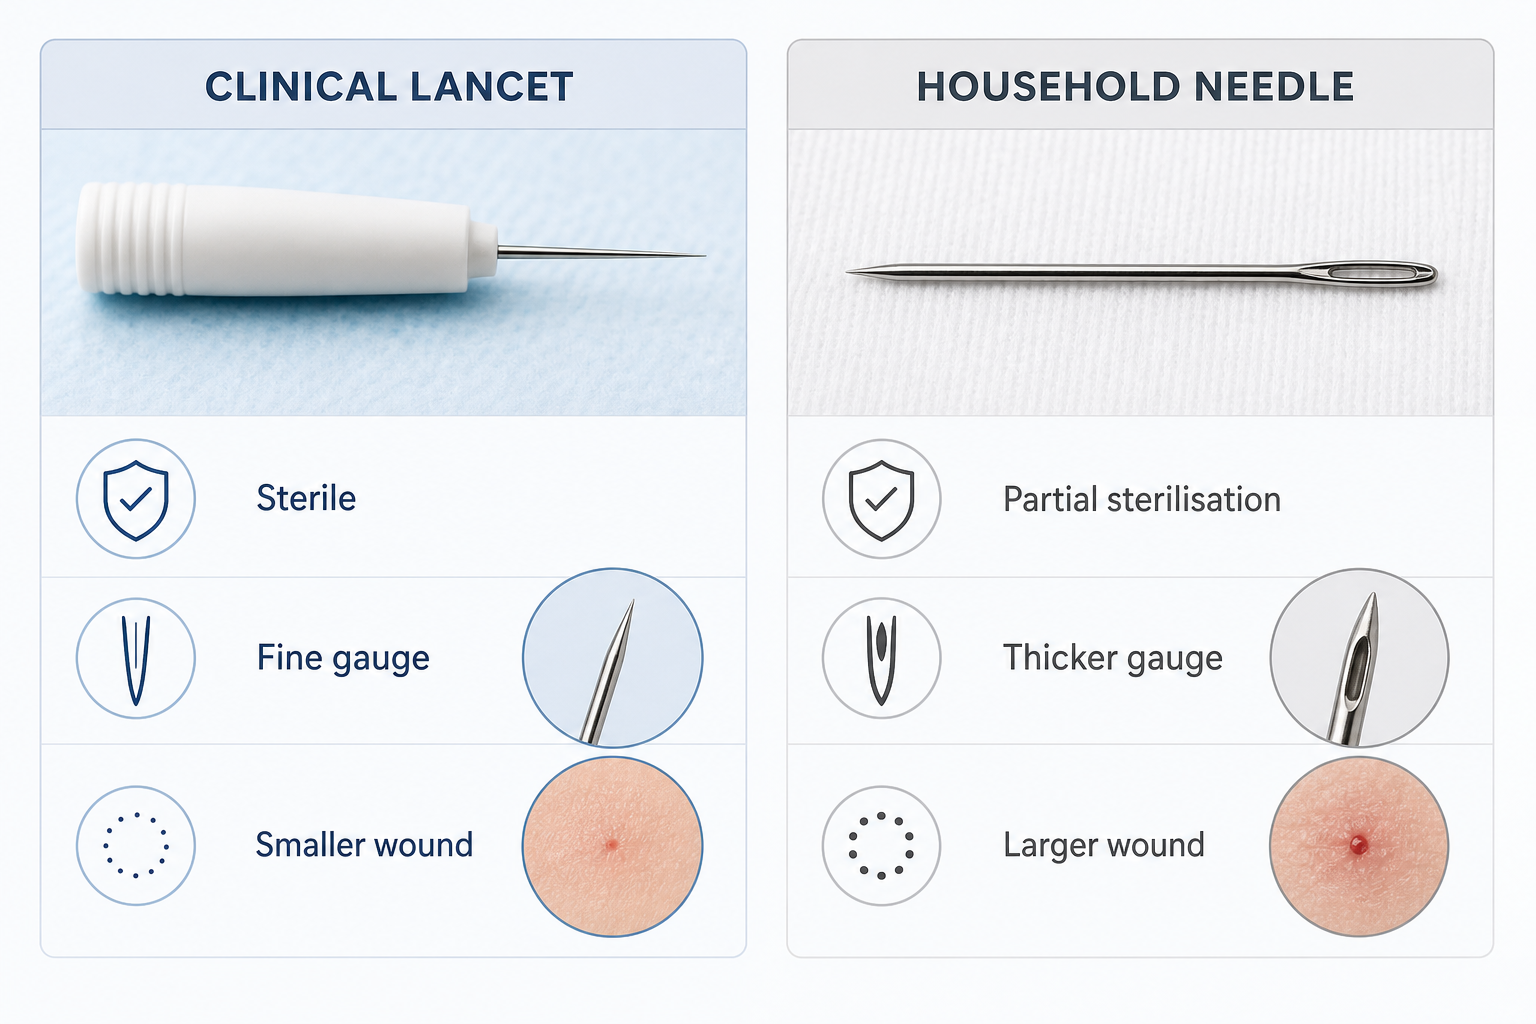
- Inadequate sterilisation: Wiping a household needle with rubbing alcohol reduces but does not eliminate microbial contamination. Sterile technique in a clinical setting involves single-use instruments that have never been exposed to environmental bacteria. A non-sterile needle introduced into a break in the skin barrier creates a direct route for infection.
- Wrong tool, wrong gauge: A sewing needle is not designed for skin lancing. It is typically too thick, creating a larger wound than necessary. A finer gauge lancet produces a smaller, more controlled incision that heals more quickly and with less risk of scarring.
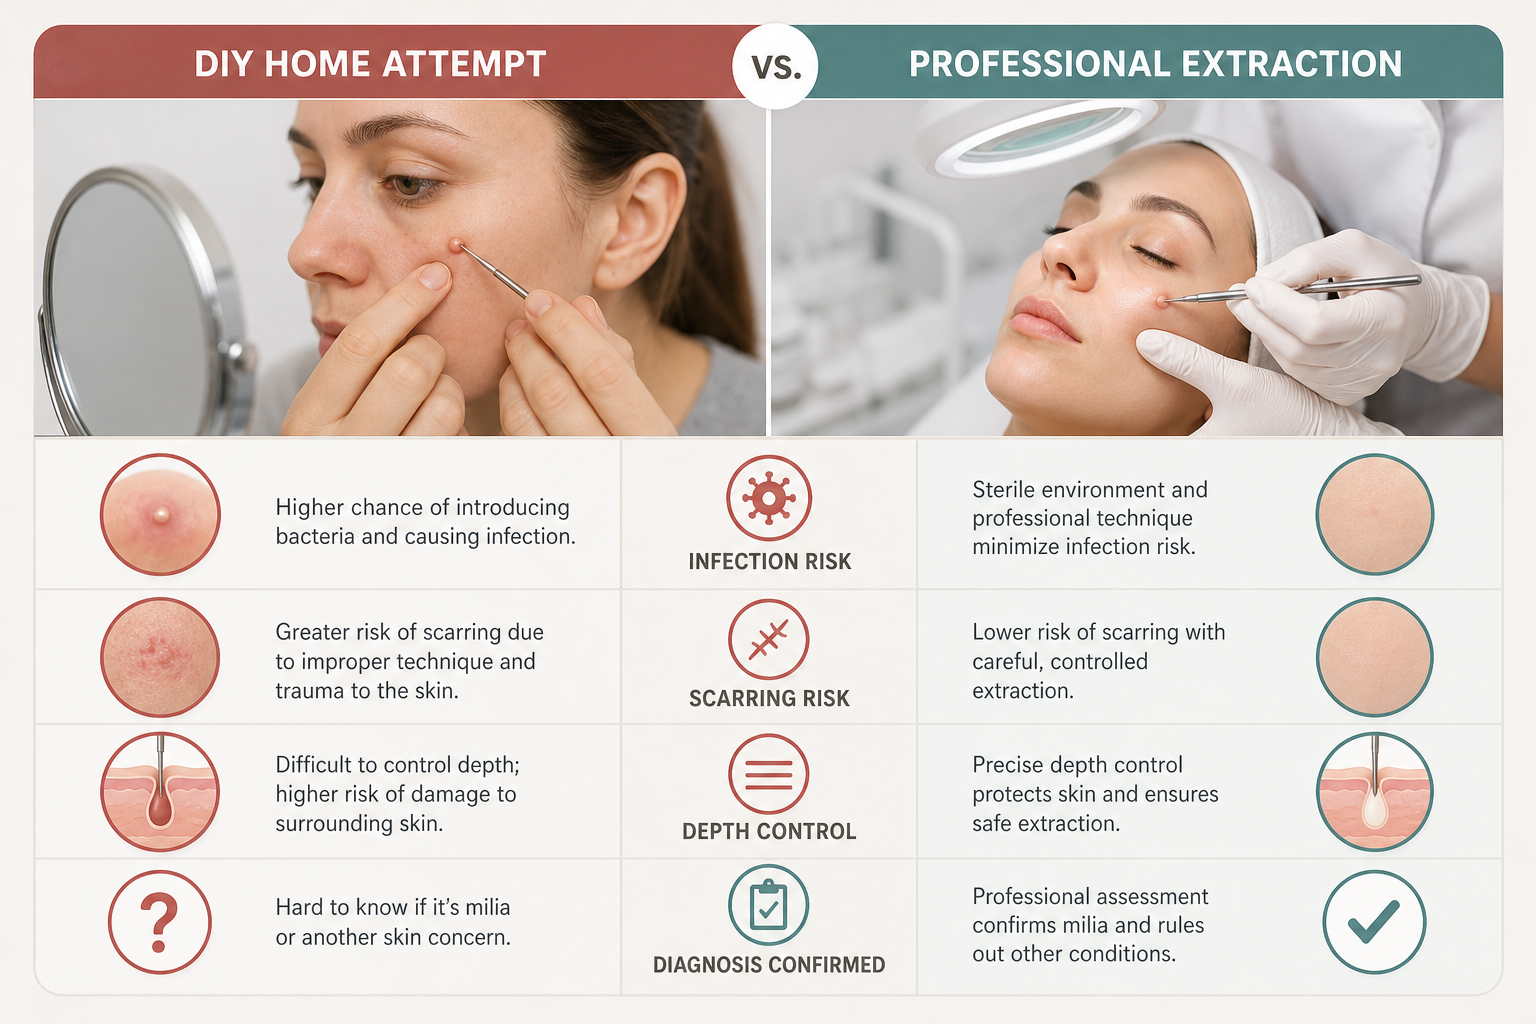
- Incorrect depth and angle: Without magnification and clinical training, it is easy to cut too deeply, entering the dermis rather than just opening the cyst wall. Dermal injury is what causes scarring and indented marks. It is also easy to cut at the wrong angle, tearing rather than incising the skin.
- Misidentification: Not every small white bump is a milium. Syringomas, sebaceous hyperplasia, xanthelasma, closed comedones, and even early basal cell carcinomas can resemble milia to an untrained eye. Attempting to lance a lesion that is not actually a milium can delay appropriate treatment and cause unnecessary skin damage.
- Scarring and post-inflammatory hyperpigmentation: Any wound that extends into the dermis can produce a permanent indented scar or a flat pit. Post-inflammatory hyperpigmentation — a darkening of the skin at the site of injury — is a particular concern for people with medium to darker skin tones (Fitzpatrick skin types IV through VI). PIH can persist for months and, in some cases, is more visible than the original milium.
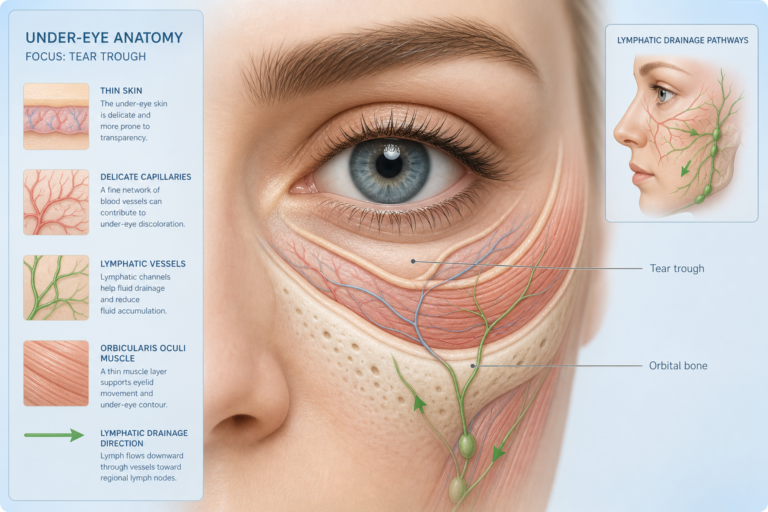
- The eye area: Milia around the eyes and on the eyelids are among the most common locations, but the skin here is exceptionally thin and delicate. The proximity to the eye itself makes any instrument-based home attempt in this area especially inadvisable.
Contraindications Worth Knowing
Certain circumstances make any form of needle extraction — professional or otherwise — more complicated. People taking blood-thinning medications may experience prolonged bleeding from even a pinpoint wound. Those on isotretinoin (a prescription oral retinoid) have altered wound healing and should avoid extraction procedures. Active skin infection in or near the area, immunosuppression, and certain inflammatory skin conditions are also relevant factors that a clinician would assess before proceeding. These are not considerations that a home attempt can adequately account for.
DIY vs Professional Extraction: A Comparison
| Factor | Home Needle Attempt | Professional Extraction |
|---|---|---|
| Instrument sterility | Partial (alcohol wipe only) | Full (single-use sterile lancet) |
| Tool precision | Household needle (often too thick) | Fine-gauge lancet or surgical blade |
| Diagnosis confirmed | No | Yes, by trained clinician |
| Depth control | Difficult without magnification | Controlled with magnification |
| Infection risk | Higher | Lower |
| Scarring risk | Higher | Lower |
| PIH risk | Higher, especially darker skin tones | Lower with appropriate technique |
| Eye area safety | Not recommended | Manageable with training |
| Suitable for all milia types | No | Clinician selects appropriate method |
Safer At-Home Alternatives to Needle Extraction
For people who want to address milia without a professional appointment, several evidence-informed topical approaches may help over time. These work by accelerating cell turnover and encouraging the skin to shed the trapped keratin naturally, rather than physically removing it.
Topical Retinoids
A topical retinoid — including over-the-counter retinol or prescription-strength tretinoin — is one of the most well-supported options for milia. Retinoids increase the rate of skin cell renewal, which helps prevent keratin from becoming trapped and can gradually encourage existing milia to resolve. Results are not immediate; consistent use over several weeks to months is typically required. Retinoids can cause initial dryness and irritation, and they are not suitable during pregnancy. Starting with a low concentration and applying every other night can help the skin adjust.
Chemical Exfoliants
Alpha hydroxy acids (AHAs) such as glycolic acid and lactic acid work at the skin surface to loosen the bonds between dead skin cells, promoting shedding and improving cell turnover. Beta hydroxy acids (BHAs) such as salicylic acid penetrate slightly deeper into the follicle. Regular use of a well-formulated AHA or BHA product may help prevent new milia from forming and can support the gradual resolution of existing ones, though they are unlikely to clear established milia as quickly as physical extraction.
Gentle Exfoliation and Skincare Adjustments
Heavy, occlusive creams and rich emollients can contribute to milia formation by slowing the natural shedding of skin cells. Switching to lighter, non-comedogenic moisturisers and ensuring thorough but gentle daily cleansing may reduce the likelihood of new milia developing. Avoiding heavy eye creams applied too close to the lash line is a practical step for those prone to milia in the periorbital area.
Professional Chemical Peels
In-clinic chemical peels using glycolic acid or other AHAs at higher concentrations than are available over the counter can accelerate cell turnover and may help resolve milia over a course of treatments. These are performed by trained practitioners and are not the same as home peel products.
Professional Treatments for Milia
When milia are persistent, numerous, or located in sensitive areas such as the eyelids, professional treatment is the most reliable option. Several in-office procedures are available beyond manual extraction.
- Manual extraction with a sterile lancet: The standard in-office procedure described above. Effective for typical primary milia and most secondary milia on accessible areas of the face.
- Cryotherapy: Liquid nitrogen is applied briefly to freeze the milium. This causes the lesion to blister and shed over the following days. Cryotherapy carries its own risk of pigmentation changes and is used selectively.
- Laser ablation: Er:YAG laser or similar devices can precisely ablate milia with minimal surrounding tissue damage. This is particularly useful for milia in delicate areas or for patients with multiple lesions.
- Curettage: A small curette (a spoon-shaped instrument) is used to scrape out the milium contents after a tiny incision. This is a variation of the manual extraction approach.
- Plasma pen: An emerging option that uses a plasma arc to create a controlled micro-injury at the milium site, encouraging the lesion to crust and shed. Evidence for this application is still developing.
The choice of professional treatment depends on the number and location of milia, the patient’s skin type, and the clinician’s assessment. A dermatologist or trained esthetician can advise on the most appropriate approach after examining the skin.
Aftercare Following Milia Extraction
Whether extraction is performed professionally or attempted at home, the small wound left behind requires appropriate care to heal well and minimise the risk of complications.
- Keep the area clean with a gentle, non-irritating cleanser.
- Avoid applying heavy or greasy products directly over the treated site while it heals.
- Allow any small crust that forms to fall away naturally — picking at it increases the risk of scarring and post-inflammatory hyperpigmentation.
- Apply a broad-spectrum sunscreen daily, as fresh skin is more vulnerable to UV-induced pigmentation changes.
- Avoid applying makeup directly over the pinpoint wound for the first day or two if possible.
- A pinpoint wound from a professional extraction typically heals within three to five days. A larger or deeper wound from an imprecise home attempt may take longer and carry a higher risk of leaving a mark.
How to Prevent Milia from Returning
Milia can recur after extraction if the underlying skin habits or product choices that contributed to their formation are not addressed. Consistent use of a gentle exfoliant or topical retinoid helps maintain adequate cell turnover and reduces the likelihood of keratin becoming trapped again. Choosing non-comedogenic skincare and makeup products — particularly around the eye area — is a practical preventive step. Removing makeup thoroughly each evening, protecting the skin from sun damage with daily SPF, and avoiding unnecessarily heavy creams all support a skin environment less prone to milia formation.
It is also worth noting that some people have a genetic predisposition to milia or naturally slower cell turnover, meaning that even with optimal skincare habits, occasional milia may still develop. In these cases, periodic professional extraction or a maintenance retinoid regimen may be the most realistic long-term approach.
Frequently Asked Questions
Can I sterilise a sewing needle well enough to use it safely on milia?
Wiping a needle with rubbing alcohol reduces surface bacteria but does not achieve the level of sterility provided by single-use clinical lancets. Household needles are also typically thicker than the fine-gauge instruments used professionally, which means a larger wound and a higher risk of scarring. Alcohol sterilisation alone is not equivalent to sterile technique in a clinical setting.
Will milia go away on their own without treatment?
Some milia — particularly neonatal milia in newborns — resolve spontaneously within a few weeks. In adults, primary milia can occasionally resolve on their own over several months, but many persist indefinitely without active treatment. Secondary milia may improve if the triggering cause is removed. Topical retinoids and chemical exfoliants can accelerate natural resolution.
Does milia removal leave scars?
Professional extraction performed correctly leaves a pinpoint wound that typically heals without a visible scar within three to five days. Home attempts carry a higher risk of scarring because of the difficulty in controlling incision depth and maintaining sterile technique. Deeper wounds, infection, or picking at healing crusts all increase scarring risk.
Are milia under the eye safe to remove at home?
The skin around the eye is among the thinnest on the face, and the proximity to the eye itself makes any instrument-based home attempt in this area particularly inadvisable. Under-eye and eyelid milia are best assessed and treated by a dermatologist or trained esthetician who can work safely in this delicate zone.
How do I know if a bump is actually milia and not something else?
Milia are typically firm, white or yellowish, dome-shaped, and one to two millimetres in diameter, with no visible pore. However, syringomas, sebaceous hyperplasia, xanthelasma, closed comedones, and other conditions can look similar to an untrained eye. If you are uncertain about what a bump is, professional assessment before any extraction attempt is the safest course of action.
How long does it take for topical treatments to clear milia?
Topical retinoids and chemical exfoliants work gradually by improving cell turnover rather than physically removing the cyst. Noticeable improvement may take several weeks to a few months of consistent use. These approaches are more effective at preventing new milia than rapidly clearing established ones.
Can milia come back after professional extraction?
Yes. Extraction removes existing milia but does not address the underlying tendency for keratin to become trapped. Without changes to skincare habits — such as switching to non-comedogenic products, incorporating a retinoid, or using regular gentle exfoliation — new milia can form in the same or nearby areas over time.
Should You Attempt Home Removal or See a Professional?
The needle technique for milia removal is a legitimate and effective procedure — but its safety depends heavily on the conditions under which it is performed. In a clinical setting, with a sterile lancet, appropriate magnification, confirmed diagnosis, and a trained practitioner, manual extraction is a low-risk, quick, and reliable treatment. At home, the same basic approach carries meaningfully greater risks: inadequate sterilisation, imprecise depth control, the possibility of misidentifying the lesion, and a higher likelihood of scarring or post-inflammatory hyperpigmentation, particularly for those with medium to darker skin tones.
For most people, the most sensible starting point is a course of topical retinoid or AHA-based exfoliant, which may gradually resolve milia and prevent new ones from forming without any physical intervention. If milia are persistent, numerous, located near the eyes, or causing significant cosmetic concern, a consultation with a dermatologist or trained esthetician is the most reliable path to safe and effective removal. A professional can also confirm that what you are treating is actually milia — a step that matters more than it might seem. If you do choose to attempt home extraction, understanding the genuine risks involved and recognising when to stop and seek professional help is essential.