
Tear Trough Filler Injection Process: Step-by-Step Guide
Tear trough filler is a non-surgical treatment used to soften the hollow area beneath the lower eyelid, where volume loss can create shadowing and the appearance of dark circles. This comprehensive guide to tear trough filler walks through each stage of the process, from initial consultation to aftercare.
Understanding what happens before, during, and after a tear trough filler procedure can help readers feel more prepared when exploring independent specialists in London. While outcomes vary between individuals, most treatments follow a similar clinical pathway involving assessment, injection, and structured recovery.




Thousands of satisfied customers


Consultation Before Tear Trough Filler Injection
Before any product is injected, a qualified practitioner will carry out a consultation to understand the patient’s concerns and assess whether tear trough treatment is an appropriate option. This stage is considered essential to safe, individualised care.
The consultation typically includes a discussion of aesthetic goals, a review of relevant medical history, and an explanation of realistic expectations. Clinical judgement at this stage often shapes the entire tear trough filler procedure that follows.
Facial Assessment and Treatment Planning
Practitioners examine the tear trough area alongside broader facial anatomy, considering skin quality, volume deficiency, and symmetry. This helps determine whether the tear trough deformity stems mainly from volume loss, skin laxity, or fat pad changes around the eyes.
Treatment planning also factors in the medial tear trough versus the lateral tear trough area, since each may respond differently to filler placement and require a distinct injection approach.
Medical History and Contraindications
A detailed medical history review helps identify factors that could affect suitability for dermal filler treatment. Practitioners typically ask about:
- Current medications, including blood thinners
- Known allergies, particularly to lidocaine or other components
- History of cold sores or active skin infections near the eyes
- Pregnancy or breastfeeding status
- Previous cosmetic procedures in the under-eye area
- Autoimmune conditions or bleeding disorders
These factors help determine whether treatment can proceed, needs to be delayed, or is not currently recommended.
Choosing Suitable Filler Product
The practitioner selects a specific hyaluronic acid filler based on its consistency, integration properties, and expected longevity in thin, delicate skin. A softer, hyaluronic acid-based product is often preferred for the tear trough area to reduce visibility under the eyes.
Filler choice also considers the amount of product used and the desired outcome, since overly thick products placed too superficially can increase the risk of a bluish discolouration that can occur if product placement is not suitable, known as the Tyndall effect.
Preparing for Tear Trough Filler Procedure
Preparation in the days before treatment can help reduce the risk of complications and support a smoother tear trough filler procedure overall. Patients are usually given specific guidance tailored to their medical history and chosen product.
Following pre-treatment instructions closely is generally considered good practice, particularly around this sensitive area of the face where bruising is more likely to occur.
Pre-Treatment Instructions
Practitioners commonly advise patients to prepare in the following ways:
- Avoid blood-thinning medications or supplements before the appointment, where medically appropriate and agreed with a doctor
- Limit alcohol consumption for 24 hours beforehand
- Avoid retinol or exfoliating skincare products near the eyes
- Arrive with a clean face where possible
- Disclose any recent illness or skin concerns around the treated area
Cleansing and Skin Preparation
On the day of treatment, makeup is removed and the skin around the eyes is thoroughly cleansed. This step reduces the risk of introducing bacteria into the treated area during injection.
A disinfectant solution is then applied to the lower eyelid and surrounding skin, creating a sterile field before the practitioner begins marking injection sites or preparing the needle or cannula.
Comfort Measures Before Injection
To improve comfort, a topical numbing cream is often applied to the under-eye area for several minutes before treatment begins. Some fillers also contain lidocaine, which provides additional numbing during injection.
Ice may be used briefly beforehand to reduce sensitivity and minimise the likelihood of bruising in this thin-skinned, delicate area.
Tear Trough Filler Injection Process: Step-by-Step
The tear trough filler injection process follows a structured sequence designed to ensure accurate placement and a natural-looking outcome. Each stage builds on the facial assessment completed earlier in the consultation.
Precision matters throughout, given the proximity to the eye and the thin skin covering the tear trough area, which requires a careful, considered injection technique.
Marking Injection Sites
Using anatomical landmarks identified during assessment, the practitioner marks specific points along the lower eyelid to guide filler placement. This mapping helps ensure consistent, symmetrical results across both sides of the face.
The area is assessed carefully because of the delicate under-eye anatomy, aiming to reduce the risk of bruising or vascular complications during the tear trough filler procedure.
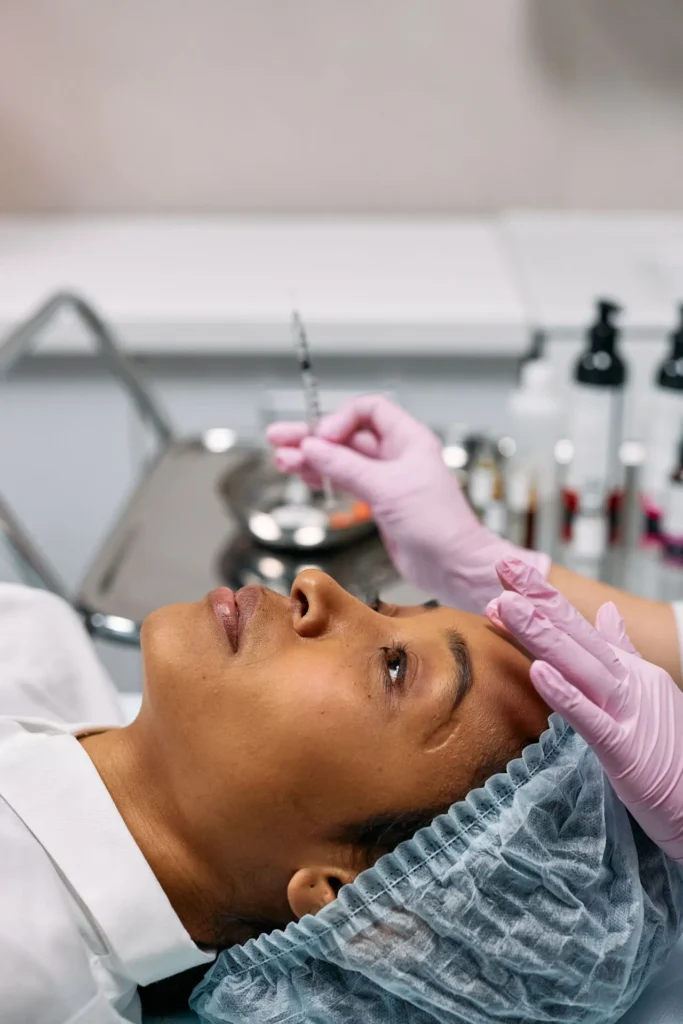
Injection Technique and Filler Placement
Filler may be introduced using a fine needle or cannula, depending on practitioner preference and individual anatomy. A cannula is often favoured for its blunt tip, which may reduce trauma to surrounding tissue.
The product is injected slowly and at a specific depth, selected by the practitioner according to anatomy and safety considerations, to minimise lumps and support smooth, even distribution across the tear trough area.
Moulding and Assessing Results
Once filler has been placed, the practitioner may gently massage the area to encourage even distribution and check for symmetry between both eyes. Minor adjustments can be made if one side appears more hollow.
This assessment stage helps achieve a balanced appearance before the patient leaves the treatment room, though final results only become fully visible over the following days.
Procedure Duration and Patient Experience
Most tear trough filler appointments last between 30 and 45 minutes, including numbing time. Patients typically describe a pressure sensation rather than sharp pain during injection.
| Stage | Approximate Duration |
| Consultation and assessment | 10—15 minutes |
| Numbing cream application | 15—20 minutes |
| Injection process | 10—20 minutes |
| Moulding and final check | 5 minutes |
Results After Tear Trough Filler Treatment
Results after tear trough filler treatment typically develop in stages, with some changes visible immediately and others emerging as initial swelling resolves. Understanding this timeline can help set realistic expectations.
Individual healing varies, and factors such as skin thickness and the amount of filler used can influence how quickly final results become apparent.
Immediate Changes After Procedure
Patients often notice a visible reduction in hollowing straight after treatment, alongside some temporary swelling, redness, or a small bruise at the injection site. These effects are considered a normal part of the healing process.
Swelling can sometimes make results look slightly more pronounced than the eventual outcome, which is one reason practitioners recommend waiting before judging the final look.
Final Results Timeline
Most swelling and bruising subside within one to two weeks, at which point the product has settled into the surrounding tissue. This is generally considered the point at which final results can be properly assessed.
Some practitioners recommend a follow-up review around this stage to check symmetry and discuss whether any additional filler is needed.

How Long Results Last
Longevity depends on several individual factors rather than a fixed timeframe. Considerations affecting how long results last include:
| Factor | Effect on Longevity |
| Type of filler used | Denser products may last longer |
| Metabolism | Faster metabolism can break down filler sooner |
| Lifestyle | Sun exposure and smoking may reduce longevity |
| Treated area | Tear trough filler often lasts 9—12 months |
Recovery and Aftercare
Aftercare plays a meaningful role in supporting comfort and reducing the risk of complications following tear trough treatment. Most guidance focuses on the first few days after the procedure.
Following recommendations closely can help minimise swelling and support a smoother overall recovery experience.
First 24 to 48 Hours After Treatment
In the first two days after treatment, patients are generally advised to:
- Avoid strenuous exercise and excessive heat, such as saunas
- Sleep with the head slightly elevated where possible
- Avoid touching or applying pressure to the treated area
- Delay makeup application for at least 12 hours
- Avoid alcohol to reduce the risk of bruising
Managing Swelling and Bruising
Mild swelling or a small bruise is a common and expected part of recovery. A cold compress can be applied gently to the area to help ease discomfort during the first day or two.
Bruising typically fades within one to two weeks, though individual healing times vary depending on skin sensitivity and the injection technique used.
Follow-Up Appointments
A follow-up appointment allows the practitioner to assess results once swelling has fully resolved. This review may identify whether a small touch-up is appropriate to refine symmetry.
Ongoing assessment also gives patients an opportunity to discuss how the results are settling and to plan for future maintenance treatment if desired.

Choosing a Qualified Practitioner for Tear Trough Filler Treatment
Selecting an experienced medical professional is one of the most important decisions when considering tear trough filler treatment, given the delicate anatomy involved. Suitability depends on the practitioner’s training as much as the product used.
When comparing options, readers may wish to consider:
- Verified qualifications and specific experience with the tear trough area
- Before-and-after photos of previous tear trough filler procedures
- Genuine patient reviews and consultation quality
- Clear communication about potential risks and realistic expectations
- Clinic safety standards and protocols for managing complications
- Availability of hyaluronidase to dissolve filler if required
Frequently Asked Questions
How painful is tear trough filler treatment?
Most patients describe mild discomfort rather than significant pain, often likened to pressure or slight stinging. Topical numbing cream and filler containing lidocaine are commonly used to improve comfort. Sensitivity can vary depending on individual pain tolerance and the specific injection technique used, but the tear trough procedure is generally well tolerated overall.
How long does the procedure take?
A typical appointment lasts between 30 and 45 minutes, including numbing time, consultation checks, and the injection itself. Longer appointments may occur if additional assessment or symmetry checks are needed. Follow-up reviews, usually scheduled separately, tend to be shorter and focus on evaluating results rather than repeating the full procedure.
When will final tear trough filler results appear?
Initial improvement is often visible immediately, though final results typically emerge once swelling and any bruising subside, usually within one to two weeks. This settling period allows the product to integrate fully with surrounding tissue, giving a more accurate impression of the treated area’s final appearance and contour.
How long do tear trough fillers last?
Results commonly last between 9 and 12 months, though this varies depending on the type of filler used, individual metabolism, and lifestyle factors such as sun exposure. Some patients may notice results lasting slightly longer or shorter, which is why periodic reassessment with a practitioner is often recommended.
What should be avoided after tear trough filler injections?
Patients are generally advised to avoid strenuous exercise, excessive heat, alcohol, and touching the treated area for at least 24 to 48 hours. Makeup application is typically delayed for 12 hours. These precautions aim to reduce swelling, bruising, and the risk of disrupting filler placement during initial healing.
Can tear trough fillers be dissolved?
Yes, hyaluronic acid filler can be dissolved using an enzyme called hyaluronidase if results are uneven, excessive, or unsatisfactory. This option may also be recommended in rare cases of complications. Dissolving is typically carried out by a qualified practitioner following an assessment of the treated area.
What are signs of complications after the treatment?
Patients should seek prompt medical attention if they notice increasing pain, unusual swelling, skin discolouration, or changes in vision after treatment. While uncommon, these symptoms can indicate vascular complications. Contacting the treating practitioner immediately is generally recommended rather than waiting for symptoms to resolve on their own.
Are there risks with tear trough fillers?
As with any cosmetic injectable, the procedure carries potential risks, including bruising, swelling, lumps, infection, or the Tyndall effect if filler is placed too superficially. Rare but serious vascular complications are also possible. Choosing an experienced practitioner and following aftercare guidance can help manage, though not eliminate, these risks.